Cloth Baby Wipes
Anne had a couple of twin sized organic cotton sheets that she didn’t want any more, and she suggested we use them to make baby wipes. We took her up on her advice, and I couldn’t be more pleased with the results. It was a really quick and easy project, and a great way to re-purpose old sheets.
The sheets were both fitted, one was jersey knit and the other was standard weave. Ashley took a seam ripper to the corners as best she could, but we ended up losing a bit of fabric anyway. Looking around online, I found some other cloth wipes that were 8 1/2″ squares. I decided to measure them out to 9″ square because I have big hands and I knew the jersey sheets were going to curl a bit at the edges. Between the two sheets we were able to make 64 cloth baby wipes!
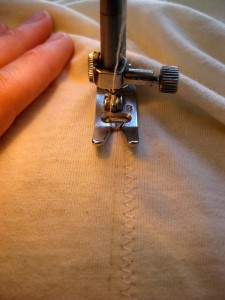
I started by marking out a grid on the sheet, with four long columns divided into seven boxes on the sides and nine in the middle (I wasn’t able to use the parts where the corners had been). Since I knew I’d be cutting along the pencil lines, I made two wide zig-zag stitches on either side of the line, starting with the long lines.
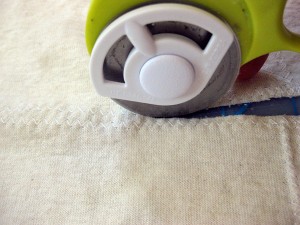
After I had all the long lines stitched, I sewed the cross lines, making sure to double back every time I crossed a long line to help secure the stitches after cutting the wipes apart. Then it was just a matter of cutting along all the pencil lines. I actually found it easier to cut off the first half once I had all the stitches done for it so that I didn’t have to keep shifting around the whole sheet.
And since we’ve been dying a bunch of diapers lately, we through the wipes in, too, to add some color. They turned out great! I like the standard weave wipes the best because they lay flat and they feel the softest. But I think the jersey knit wipes will hold up longer. We’ll see….
Raspberry Peanut Butter Chocolate Bars
Safeway had local raspberries reduced for quick sale today and I couldn’t pass them up. Then I got home and realized that I had a whole flat of raspberries that were all ripe- just touching them turned them to juice. We’ve been on a bit of a protein kick lately, so I decided to try to do something with peanut butter (because obviously the protein in peanut butter completely counteracts all the carbs in the raspberries, sugar, and chocolate…).
I couldn’t find quite the recipe I wanted, so Ashley and I started with the ‘Raspberry-Chocolate Chip Blondie Bars’ recipe from ‘Vegan With A Vengeance‘. It doesn’t call for peanut butter, but a little serendipity helped out: we ran out of soy yogurt, so we subbed in peanut butter. The recipe calls for holding out some of the blondie batter and putting it on top of the raspberry topping, kind of like a cobbler. I’m more a fan of crisps and crumbles with the oatmeal streusel style topping, so I adapted a recipe from ‘Sweat and Natural‘ to go on top. Here’s the recipe:
2 1/2 cups fresh raspberries
3 Tablespoons cornstarch
1/4 cup cold water
1/3 cup sugar
Blondie Layer
3 3/4 cups flour
1 1/4 teaspoons baking soda
1/2 teaspoon salt
1/2 cup peanut butter
1/2 cup soy milk
1/2 cup plus 2 Tablespoons canola oil
2 cups sugar
1 Tablespoon vanilla extract
Crumble Topping
1/2 cup rolled oats
3/4 cup flour
1/8 teaspoon sea salt
3 Tablespoons canola oil
3 Tablespoons maple syrup
You’ll also need 1/2 to 1 cup chocolate chips (depending on how much you NEED chocolate).
For the raspberry layer: combine all ingredients in a saucepan and bring to a low boil. Reduce heat and simmer for ~5 minutes, or until thickened.
For the blondie: combine wet and dry ingredients separately, then mix together. The dough should be stiff, a bit like peanut butter cookie dough.
For the crumble: combine dry ingredients, then add wet ingredients. Use your hands to help the mixture crumble.
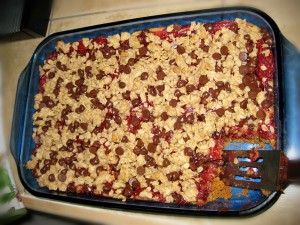
To assemble, press the blondie dough out into an even layer in the pan. Spread the raspberry filling on top of the dough, then sprinkle with 1/2 the chocolate chips. Use your hands to crumble the… uh… crumble on top of the raspberry layer. Sprinkle the rest of the chocolate chips on, and bake for 40-45 minutes. Let it cool for ~20 minutes before you cut into it. Enjoy!
Duck Omelettes
Last night for dinner we scrambled some eggs from our friends’ duck Olive. We mixed in some fresh tomatoes, pesto, and buffalo mozzarella. We are blessed in the pacific northwest to be surrounded by local farms, but this was the first time I’ve ever eaten eggs from someone I know.
To be honest, I was a little uneasy getting ready to crack them. It made me kind of squeamish to think of them coming from the body of a living creature whose face I had seen. But once they were in the bowl, they just looked like big chicken eggs. I was actually surprised that what I think of as fairly different kinds of birds have such similar eggs. I wonder what unfertilized robin, crow, and hummingbird eggs look like inside.
Anyway, I’ve been wanting to shift my diet more toward locally produced foods, so I was happy to make that connection. Also, Olive’s caretaker asked for the shells back because she eats them, so one less thing in the waste stream. (Our local trash company just started accepting food scraps in with the yard debris bins, but they only take produce, no animal products.)
I’ve also been enjoying lots of fresh local berries picked by friends, and thinking about trying out some preserving this year. Summer’s going by quickly though…
Little Bug’s Baby Shower
 We had our family baby shower this weekend. When Mehalia was born, Anne and Ben buried her placenta at the base of a Bay Laurel, and we really like the idea of having a tree for Bug’s placenta, so Ashley’s mom got us a beautiful Japanese Maple. People put cards in it for us at the shower. Hopefully the tree can handle living in Yakima with its cold winters.
I’ve been reading Husband-Coached Childbirth : The Bradley Method of Natural Childbirth, and I just read a bit that Dr. Bradley wrote about the placenta. I had heard that animals and people sometimes eat the placenta after birth and I assumed the new mothers did so to replace some of the iron they may have lost during childbirth. While that may be partially true, Dr. Bradley also said that there may be a chemical in the placenta that helps stimulate uterine contraction after birth and that people used to take pills made from dried and ground placentas to help with bleeding after labor (uterine contraction is important to help stem the flow of blood to the uterus and heal the place where the placenta detaches from).
I’ve also heard that many people believe the placenta has healing and magical properties. While I don’t know if any of this is true, it’s clear that there’s something special about the placenta. Anyway, I love that we will have a beautiful tree to remind us of our baby’s first home.
Placemats
Another really fun thing we did at the shower was play “Placemats,” a game that works like this:
- Everyone takes a piece of paper and writes down a phrase.
- People pass their paper to the left, and then everyone draws a picture to represent the phrase on the paper that was passed to them.
- After folding down the paper so that the original phrase is covered and only the picture is visible, the papers are passed to the left again, and each person writes a phrase to represent the picture.
- Write, Draw, Pass, Repeat
We did several rounds of “interpretation,” and we ended up with some really funny phrases (things got especially funny after passing through Mehalia’s hands). A great example: one page started with “If you stay ready, you don’t have to get ready,” and transitioned to “I’m so unhappy when my clothes fall off.”


